Showing posts with label sewing. Show all posts

Tuesday, February 21, 2012

Put to Good Use

This is a small cloth bag that came with a tablecloth that I purchased a few years ago.
There is one on Amazon that is just like it, no mention of the cloth bag, but it might still come with it.
The bag is made with the same cloth that the tablecloth is made of--very cottagey! :-)
Well, being the possessor of a new Netbook (small laptop) that needed a protective bag, I thought of this cloth bag that had not found a purpose--even as beautiful as it is. 
I added a gingham lining and a layer of cotton batting in between to make a soft bed for the netbook.
The ricrac was already there and I hand-stitched the buttonhole so it would go through all the layers.
I didn't take a photo of the small bag that I also made of polarfleece to place the cord/adaptor into that goes into this netbook bag. There is even room for my camara to slide into the bag. Yeah!!!

Tuesday, February 14, 2012

Never Too Old

A tiny felt lapel pin that I made for Meg as a kindergartener some years ago.
Em wore it too, a few years back.
But announced in no uncertain terms when she saw it this year that
"she wasn't wearing that to school!"
(hee-hee)
That's alright because I'll wear it. :-)
Happy Valentines Day!

Wednesday, December 14, 2011

Little ho ho

Gnomish wee santa in green gingham? 
Kind of an odd little bugger.
Loved making the tiny hat and sewing his little pink nose.

Monday, December 12, 2011

Sushi, Anyone?

A felt rice warmer for an ill special someone who adores sushi. 
A new twist on a penny rug, eh?
I filled the felt pouch with rice so that once heated in a microwave for 30 seconds it becomes a cozy warm heating pad.

Monday, December 5, 2011

Christmas in Stitches

A little holiday stitching project for you!
You'll find the pdf HERE.
Please let me know if you have any troubles accessing the pdf. 
I made a wee pillow when I finished stitching.
I had the hardest time finding a fabric in my stash that made the embroidery POP! 
The back of the pillow is dotted (yeh!) from the same fabric line.

Have Fun!!!  :-)

Thursday, September 8, 2011

Hiding Behind a Little Face

A small pair of scissors in a felt case I made.
I know I keep going back to the matryoshka for a design,
but in this case it really did fit the size and shape that I needed.
(and I still love the little dolls) :-) 
A little slit in the back accomodates my embroidery scissors. :-)

Tuesday, August 9, 2011

Bed Pocket

I just made this bed pocket for Em.
She has gotten a loft bed for her birthday
and now has a place to stash her book, flashlight and journal at night. ;-)

Friday, August 5, 2011

Comforter and Pillow

Just a little project while I was at the lake.
Here you see the gingham quilt and pillow on a nice doll bed. 
Here is the little embroidered pillow I made of felt.
I just plopped down any old flower shape in my favorite colors.
And here is the same quilt and pillow in a little fairy home near the lake.
I fashioned a little twig bed and two acorn lamps
for the fairies as well as a wee broom.
The acorn lamps were made from a small acorn
turned upside down and glued inside a larger acorn cap.
The broom is just a pine needle cluster and a stick
with a little bit of string wrapped around them both to hold them together.
The twig bed I am not happy with--I used wire to hold the twigs together
and it got really unwieldy. I'll need to try again.

Sunday, July 10, 2011

Sewing and Growing

Em and I have been sewing.
A 4H project for this summer was to make an item of clothing so Em chose a skirt.
She has finished it and will go to judging this coming week and a style revue the following week.
Em is getting so grown-up and very tall.
I'm remembering making her a twirly skirt for kindergarten not so many years ago. ;-)

Wednesday, July 6, 2011

Purple Power

I have been waiting on you to bloom, you beautiful morning glory.
For the longest time you have swirled and twirled your way up my fence and today you burst open.
More purpley goodness.
I made this bag for my mom.
I kind of just made up the pattern by looking at pictures of bags I admired and combined the ideas. 
The beautiful fabric with the lettering on it is a fat quarter found at the quilt show we went to last month.
I used up every last bit of it on this bag, not even the smallest scrap left.

Tuesday, June 28, 2011

Tutorial for My Project Bags--Part Two

Now, to put this bag together! 
After completing all the steps in part one we can move on to what I'm doing here in this picture.
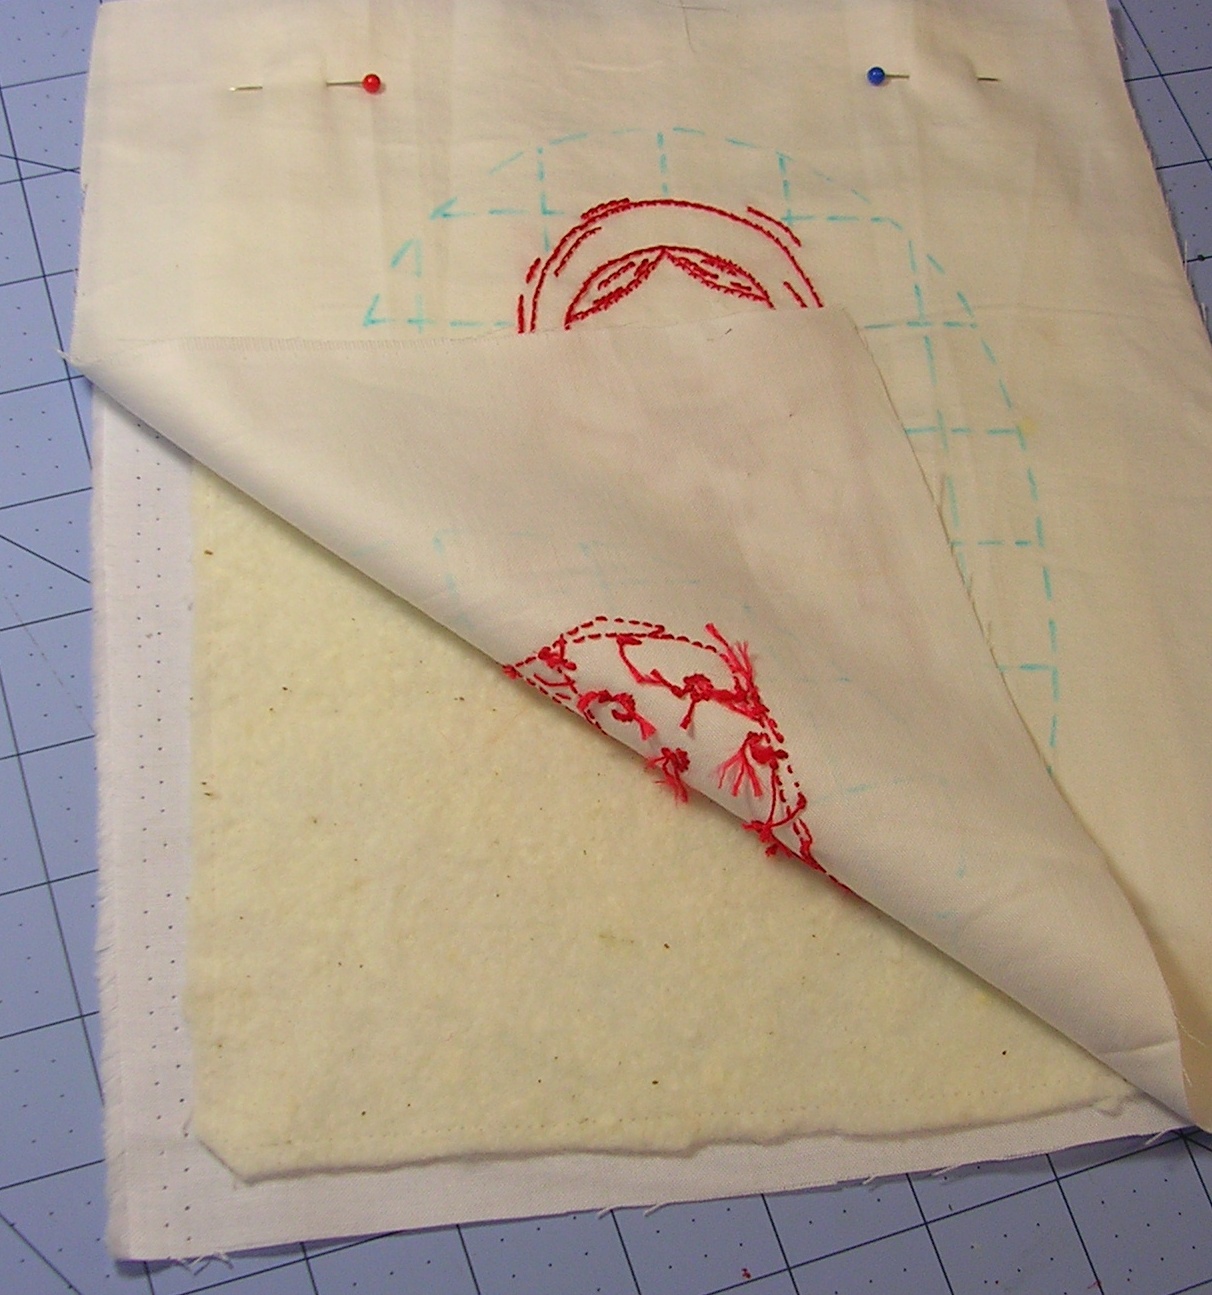
I have placed the lining inside the outside piece and lined up the side seams.
I have folded back and pressed a hem of about 1/2"- 3/4"
on the outside piece and the lining so that the hems face each other.
You'll notice that the lining is a little longer than the outside piece
 (it was cut a little longer for this purpose).
I have done this because I like the lining peeking out along the edge.
If you don't like this you can just fold the lining hem down a little more so the edges line up. 
This shows a very close stitch line, topstitching the two top hems together. 
I did two lines of topstitching along the top.
You can see that the lining is peeking out over the edge of the outer piece. 
Now on to the drawstring casing,
At the ends of the casing I pressed back 1/2"
and then press the two long sides to meet in the middle of the wrong side. 
Then I pressed back the casing ends another 1/2" and stitched it flat.
This provides a good, strong opening for the drawstring. 
I pinned the drawstring casing to the project bag with the ends meeting very closely at one side seam.
Here is the drawstring casing at the side seam after I topstitched it down.
I went back and forth over the open ends of the casing to tack it down well. 
The drawstring is made by folding the drawstring fabric in half,right sides together,
stitching down the length, turning and pressing.
Then the drawstring is threaded through the casing with a safety pin
(to aid the threading process) and.......
Voila!!
You have yourself a project bag. :-)
Please let me know if any of my instructions are confusing.
Also, I would love to see your finished project bags.

Monday, June 27, 2011

Tutorial for My Project Bags--Part One

Here it is!!!
A new project bag with instructions on how I put it together. :-)
OK, so the very first thing to do is pick out two or three fabrics which you like together.
Cut out one piece for the outside of bag (32 1/2" x 16 1/2").
Another piece for the lining cut (32 3/4" x 16 1/2") (just a 1/4" longer than the outside piece).
Cut a piece 2 1/4" x 33 1/2" for a drawstring casing 
and a piece 2 1/4" x 44" for the drawstring.
This will give you the pieces needed for a bag with the finished size of 16" x 16".
I have made bags in other sizes, so you would have to adjust the measurements for that.
Next, plan and make an embroidered project or use another decoration for the front of the bag.
I quilted my embroidery by hand first,

and then I free-motion embroidered the redwork to the front of the bag.
I placed it a little lower than the center to take into account the later drawstring casing placement.
Here I am stitching the outside piece along both sides, leaving the top open.
I placed it right sides together and used a 1/4" seam (included in measurements).
Turn and press the outside piece.
Stitch the two sides of the lining piece with right sides together,
1/4" seams, leaving the top open, but don't turn it.
Next time....putting it all together.

Monday, June 13, 2011

Dinky Bag

Another variant of the bags I've been making.
This time with a little ric-rac to go with the gingham on a wee baglet.
I thought to use it to take cotton floss around in when I'm embroidering.
Maybe I won't get it as tangled up as usual. 
I have a tutorial in the works for the project bags,
but it will probably be next week before I get it up here.
Thanks for being patient. :-)

Wednesday, June 8, 2011

Mousie

A mouse for you to embroider.
Please use only for personal use. Thanks!

Sunday, June 5, 2011

Dots and a Doll

I can't stop making these project bags.
This time using my embroidery pattern for a friendship doll that you can find on my side bar.
After I did the initial redwork, I traced an oval with a disappearing pen and also diagonal lines going both right to left and left to right. (not inside the dolls image)
Then I quilted the lines with off-white thread.
I washed the embroidery to get the quilting to wrinkle up. 
Then to attach the quilted piece to the bag front I used red thread.
I put on the free-motion embroidery foot and went to town.
I circled the piece with two concentric ovals, each oval stitched three times.
I used a disappearing pen again to draw on the scalloping.
I then free-motioned my way around the scallops twice.
After all this stitching I just cut the excess white fabric near the scallops,
 leaving kind of a rough edge which will soften over time. 
The inside fabric is a polka-dot of course. :-)
I think that all the fabric is Moda.

Sunday, May 29, 2011

Green Checked Bag

A large project bag that I made as a birthday gift.
The cross stitch on the front is a saved piece that was damaged while it was in storage.
I wanted to use it because it is still lovely.
I added the word "make" on the embroidery to suit the bags use.  
The lining is a cotton print from several years ago.
The casing for the drawstring is a striped fabric that I turned to the wrong side out.
It toned down the coloring so that it wouldn't grab too much attention.
Happy Birthday, Mom!!  :-)

Wednesday, April 27, 2011

Redwork Project Bag

Another project bag. This time with a redworked girl with flowers. I found the pattern online, but I don't know where. Someone had uploaded an old neddlework book that had this image, a little boy as well as some other things. If you recognize this, please let me know. 
I started this back in January and got very sidetracked by the furniture painting which turned everything upside down and backwards. I didn't spot my sewing machine until just a week or so ago.

Monday, March 28, 2011

A Little Spring

Felt chocolate bunnies popping up.

Lovely little tulips.
We have to protect them from below freezing temps at night with a milk container cover.

Tuesday, March 15, 2011

Ichimatsu

A little ichimatsu (friendship doll) to stitch as my thoughts are with the Japanese people whose strength, endurance and civilized behavior is so admirable in these horrible days.
Please stitch along with me if you want.
I am planning to stitch the finished work (a redwork square) to the front of a little work bag. 
To grab the image above, click on it, copy to your hard drive, and print the image.
Then use a window as a light box to lightly pencil the picture onto a piece of fabric.
I like to use a sharp pencil because it is a thinner line than the water soluble pen.
I don't see the pencil line when I'm done because the red thread covers it well.
The flower on the blouse and the mouth are to be worked in a lazy daisy stitch so be careful penciling that in.
The buttons on the blouse are french knots so just make a pencil dot there instead of the round circle.